Common injuries from cross country-skiing
Cross-country skiing is a fantastic sport that provides a full-body workout and allows enthusiasts to enjoy the beauty of Central Oregon winter landscapes. However, like any physical activity, it carries the risk of orthopedic injuries. Here are some of the most common orthopedic injuries associated with cross-country skiing:
-
Sprains and Strains: Sprains and strains are among the most common injuries in cross-country skiing. These injuries often occur in the lower body, particularly the ankles, knees, and hips, due to the repetitive nature of the skiing motion and the uneven terrain.
-
Shin Splints: Shin splints, or medial tibial stress syndrome, can develop from the repetitive stress placed on the muscles and tendons surrounding the shinbone during skiing. Beginners and those who increase their skiing intensity too quickly are particularly susceptible to this condition.
-
Knee Injuries: Cross-country skiing puts significant stress on the knees, making them prone to injuries such as patellar tendonitis, meniscal tears, and ligament sprains, including the anterior cruciate ligament (ACL) and medial collateral ligament (MCL). Improper technique, sudden changes in direction, and skiing on uneven terrain can contribute to knee injuries.
-
Back Pain: Maintaining proper posture while skiing is essential to prevent back pain. However, poor technique, fatigue, and weak core muscles can lead to strain and discomfort in the lower back. Skiing with a rounded back or excessive forward lean can exacerbate this issue.
-
Wrist Injuries: Falls are common in cross-country skiing, especially on challenging terrain or icy conditions. Consequently, wrist injuries, including fractures and sprains, can occur when skiers try to break their fall with outstretched hands.
-
Achilles Tendonitis: The repetitive flexing and extending of the ankle during skiing can contribute to Achilles tendonitis, an overuse injury characterized by inflammation and pain in the Achilles tendon. Skiing with improper boot fit or technique can exacerbate this condition.
-
Rotator Cuff Injuries: Injuries to the rotator cuff muscles and tendons can occur due to the repetitive arm motion involved in cross-country skiing, particularly during the poling phase. Overuse, poor technique, and skiing with improperly sized poles can contribute to rotator cuff injuries.
-
Overuse Injuries: Cross-country skiing involves repetitive motions that can lead to overuse injuries such as tendonitis, bursitis, and stress fractures. Beginners and individuals who increase their training intensity too rapidly are at higher risk of overuse injuries.
-
Concussions: Falls at high speeds or collisions with objects or other skiers can result in head injuries, including concussions. Wearing a properly fitted helmet can help reduce the risk of head trauma.
To minimize the risk of orthopedic injuries while cross-country skiing, it’s important to maintain proper technique, gradually increase training intensity, wear appropriate protective gear, and listen to your body. If you experience persistent pain or discomfort, seek medical attention promptly to prevent further injury and ensure a safe and enjoyable skiing experience.
Prevent injuries while cross country skiing
JD Downing began cross country skiing at the age of eight. His love for the sport followed him through college and into a professional skiing career that took him all around the world. “The nice thing about that experience is that even though it didn’t lead to the ultimate success that I was after, it actually made me even better as a coach later on because I learned what things are necessary to succeed,” said JD.
Today, JD is a highly sought after coach who dedicates his time to coaching high school students at Summit High School, as well as running XC Oregon, a development program for cross country skiers of all ages in Oregon.
As a highly experienced skier and coach, JD has perfected various techniques that new skiers commonly struggle with. In these two short videos, JD instructs skiers on the proper form for approaching the downhill as well as how to get back up after a fall to avoid injury.
“The number one thing I’m asked about cross-country skiing is how to get into good form and good technique for downhills.” – JD DOWNING
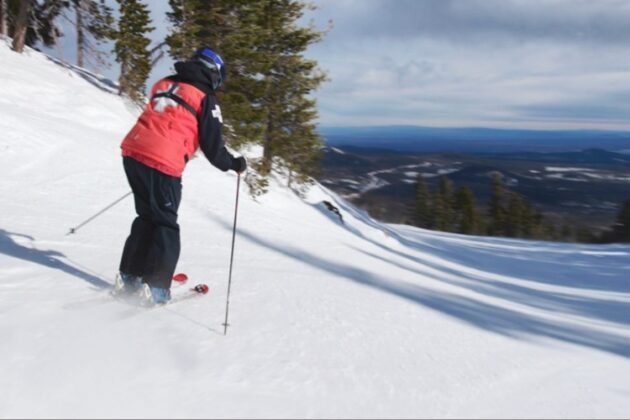
Here are JD’s tips for approaching the downhill successfully.
- The biggest thing about cross-country skiing is to remember the fundamental downhill position with your body. Get yourself into a lowered position that has more of your weight centered over the ball of the foot. If may be helpful to pretend that you have a string coming from your hands down to the tips of your skis. This will keep your hands stretched out in front of your body and will also keep you low.
- Keep your knees and ankles flexed and bent, which helps keep your weight down over that ball of your foot. This position will allow you to attack any type of hill, whether it’s a really steep hill or “turny” hill.
- On the easier terrain, when you are more relaxed, avoid standing straight up. Instead, come up into what is called a “tuck position” or a “standing tuck” position. This position, where you have your hands in front of your face and your body forward over the skis, keeps flex in your ankles and the knees, and allows you to roll over the various imperfections in the snow while maintaining a defensive position that will help you attack any hills ahead.
- As you get more and more comfortable and you’re going even faster, you can lower yourself down into what is called a “speed tuck.” This is actually a great position when you’re on a very long gradual hill and you’re not worried about where you’re going or how much speed you’re building up. It’s more relaxing than it looks because your elbows are resting on your thighs or quads. From this position you can come up into a standing position so you’re in a ready position for downhills or other obstacles.
“When you go cross-country skiing, eventually you’re going to take a fall.” – JD Downing
Here are the things you will want to think about first so that you don’t injure yourself while falling or getting back up.
- Try to fall the right way which is going forward rather than backward. Falling forward will place yourself in an easier and safer position for getting back up.
- Once you’re down on the snow, you want to make sure that you get up from a fall the proper way so you don’t make a bad situation worse.
- Orientate your equipment correctly by swinging your skis so they’re parallel to each other and are together.
- Make sure your poles are out of the way so that they do not interfere while you’re getting up.
- If you fall on any kind of slope, which is a common place for people to fall, make sure you have the skis across the fall line of the slope. You don’t want them pointed up and you don’t want them pointed down the slope, otherwise they’re going to run away from you as you’re trying to get up.
- Once you get your skis across the slope, make sure that you’re using everything but your poles in the process of getting up. Poles can sink into the snow and actually make the situation worse.
- Try to position yourself on the snow so that you are on one or both knees. Now you’re ready to slowly get back up without using your poles for assistance.
- Finally, now that you’re standing up, brush off any snow on your gloves, pants, and jacket to avoid your clothes from becoming wet.